Compress Videos For Youtube Without Losing Quality
From SoundTaxi
(Created page with "=== Introduction === Getting your videos on YouTube in perfect quality can be quiet tricky, as the final quality depends on many factors. There is a number of guidelines which sh...") |
|||
| Line 9: | Line 9: | ||
Latest versions contain best conversion profiles that ensure perfect quality and performance. | Latest versions contain best conversion profiles that ensure perfect quality and performance. | ||
| - | === | + | === Pick the right compression format=== |
To prevent quality loss from video rescaling, you will need to use one of the following resolutions for your videos - | To prevent quality loss from video rescaling, you will need to use one of the following resolutions for your videos - | ||
| Line 24: | Line 24: | ||
=== Select the video you need to compress for YouTube=== | === Select the video you need to compress for YouTube=== | ||
You can either add a single video, or queue up multiple videos to compress them for YouTube format one by one. | You can either add a single video, or queue up multiple videos to compress them for YouTube format one by one. | ||
| - | + | To compress files into MPEG-4 format, select "iPod/iPhone/iPad Video with original picture size" conversion preset. | |
| - | + | To compress files into h.264 format, select "iPod/iPhone/iPad h264 Video with original picture size" conversion preset. | |
| + | From the "Compression Quality" drop-down list, make sure you select "High Quality". | ||
| - | + | Once you are done with your customizations, convert the video and wait while SoundTaxi promptly completes its job. | |
| - | + | [[File:Compress_videos_for_YouTube.png]] | |
| - | + | ||
| - | + | === Your compressed video files are ready for YouTube === | |
| + | If you followed the instructions above correctly, YouTube will upload and process your video without quality loss. | ||
| + | After you are finished uploading, make sure you wait for up to 10 minutes until YouTube is done processing your video. | ||
| - | + | Enjoy! | |
| - | + | ||
| - | + | ||
| - | + | ||
| - | + | ||
Revision as of 10:36, 26 September 2012
Contents |
Introduction
Getting your videos on YouTube in perfect quality can be quiet tricky, as the final quality depends on many factors. There is a number of guidelines which should help you encode video files that can be processed by YouTube without incurring quality loss. To convert to one of the formats compatible with YouTube, you will need SoundTaxi Pro + Video Rip edition, which supports video conversion.
First of all, make sure that your source video is of adequate quality and that it uses either 4:3 or 16:9 aspect ratio format, or it might be stretched by YouTube processing mechanisms.
Get the latest version of SoundTaxi
Update to the latest version of SoundTaxi from our official web-site, to ensure best results. Download it from here. Latest versions contain best conversion profiles that ensure perfect quality and performance.
Pick the right compression format
To prevent quality loss from video rescaling, you will need to use one of the following resolutions for your videos - HD video (1080p: 1920x1080 or 720p: 1280x720); standard video (480p: 854x480 or 360p: 640x360 or 240p: 426x240).
In regards to the video formats, YouTube recommends the following - H.264, MPEG-2 or MPEG-4 format 640x480 (SD) or 1280x720 (HD) for 4:3 & 16:9 aspect ratios. Frame rate should be the same as original video Sampling rate: 44.1KHz for MP3/AAC audio
SoundTaxi Pro + VideoRip supports these formats and will get your video files for YouTube in a blink of an eye.
Select the video you need to compress for YouTube
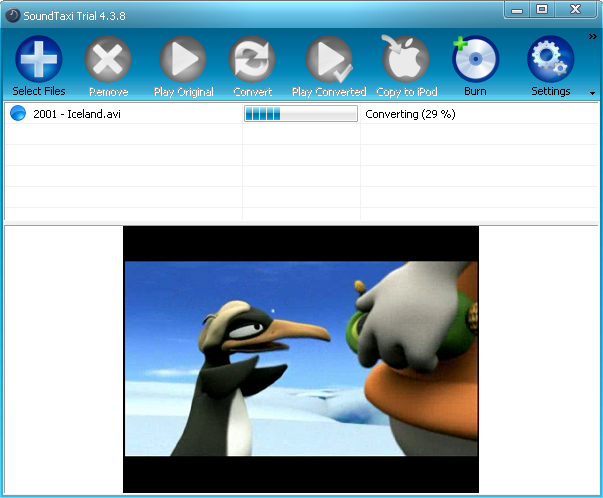
You can either add a single video, or queue up multiple videos to compress them for YouTube format one by one. To compress files into MPEG-4 format, select "iPod/iPhone/iPad Video with original picture size" conversion preset. To compress files into h.264 format, select "iPod/iPhone/iPad h264 Video with original picture size" conversion preset. From the "Compression Quality" drop-down list, make sure you select "High Quality".
Once you are done with your customizations, convert the video and wait while SoundTaxi promptly completes its job.

Your compressed video files are ready for YouTube
If you followed the instructions above correctly, YouTube will upload and process your video without quality loss. After you are finished uploading, make sure you wait for up to 10 minutes until YouTube is done processing your video.
Enjoy!